Thursday, December 20, 2007

Collapsed Lung Redux

Collapsed Lung Card from Dawn


I have to say I'm amazed to be sitting at home right now. It's a testament to modern medicine that barely 24 hours ago, I had multiple holes and multiple tubes in and out of my body, and of course, a collapsed lung to deal with. Yet here I am, watching TV with a remote with more than one button, eating killer cheesy grits, and, most importantly, rocking two lungs at full capacity.


Granted, it's not all gumdrops and lollipops (or whatever kids eat these days... Rock Star and Ritalin?). I feel like a stabbing victim, which I essentially am. I've now got a total of four holes in my rib cage and they all hurt in unique and interesting ways. My stomach is still pretty rocky from all the drugs from anesthesia, and the two helpings of cheesy grits I just ate, while super tasty, are not helping matters.


There is a long list of things I can't do for the next week or two. The highlights include:


  • Lift anything heavier than 10 lbs

  • Drive a car

  • Fly

  • Shower


Actually, I can shower in two days or so, but things are already kind of funky. Amy lit a candle... either she's trying for a candle-lit holiday mood, or the stench has gotten to her. I'm also on regular doses of oxycodone and stool softeners, which is a winning combination, let me tell you.


The collapsed lung has definitely put a damper on my holiday plans, but things aren't so bad. It seems my parents are going to come out in early January to visit. I might try to find my way to Winthrop to see a few aunts, uncles, and cousins, and most likely get stuck in the snow. Finally, Amy has some interesting plans up her sleeve for a very special Christmas Eve to make up for the one I'll be missing back home.


So all-in-all, a collapsed lung sucks, but the possibility that it's fixed for good now, my quick stay in the hospital, and all the support from friends and family makes it all a little more bearable. Thanks everybody. My New Year's resolution is to stay out of the ER in 2008. I'll try my best ;)

Tuesday, December 18, 2007

Live Blogging Collapsed Lung 2007

Never one to trivialize serious health problems with a little bit of pointless technology, I've decided to live blog my time here at UW Medical as I get treated for my latest malfunction. I'm going to try posting the latest updates towards the bottom of the page, so read from the top down if you want to bring yourself up to speed.


Dr. Collapsed Lung Evil

Tuesday, Dec. 18th, 2007


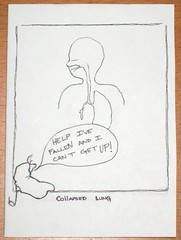
8:45 am - Crap I've collapsed my lung again.


8:45 am - 1:58 pm - A lot has happened in last few hours from "pop" to "blog", so let's get down to it. If you remember anything about the last collapse, you'll know it happened ~ June 2005, early morning while I was in the shower. Once again, the shower was my downfall. It happened the exact same way... one moment I was lost to lather, rinse, repeat, and the next I'm wondering why it hurts when I breathe.


I knew almost immediately what had happened, even if I tried to deny it to myself at first. Ever the pragmatist, I packed for what I assumed would be an extended stay at the hospital. I caught the bus to the ER, they took a chest x-ray, listened to me a breathe and confirmed what I already knew.


Drip


I'm currently hooked up to oxygen, a IV drip, and an oxygen sensor on my left index finger that makes it a pain to type. I met with a thorasic resident and fellow about an hour ago and we talked about "the plan." Last time, the plan was to put in a chest tube to vacuum out all the air that had escaped into my chest cavity and allow the lung to refill and heal. This worked great once they got the chest tube in place (three tubes later), but apparently not well enough.


Now that I've had my second collapse, I qualify for the repeat offender treatment, where in they attempt to actually discover what's wrong with me instead of just patching my holes. Unfortunately, this involves some minor surgery and general anesthetic. The plan is to make a few small incisions on my right rib cage, go in with video cameras, and put it all on YouTube. Depending on what they see, there are a couple options. First, the tall skinny white boy hypothesis: tall, skinny males my age are susceptible to random collapsed, possibly due to a blip forming in the lung that is weaker than regular tissue and prone to popping. If they find such a section, they'll cut it out. If they don't find anything obvious, they'll toss some talc powder on my lungs (no really), which will aggravate and annoy the lungs, causing them to grow back fighting mad, stronger than ever.


Regardless, I'm still looking at 2-3 days with a chest tube here in the hospital. I'm currently on standby for surgery so it could happen any time betwee now and 6pm. I'll keep you posted.


2:17 pm - I need to use the bathroom... where did all the nurses go?


2:38 pm - Need a trusted source of information to tell you all you need to know about collapsed lungs? Why not Wikipedia? See Pneumothrorax.

3:20 pm - Still chilln' in the ER. If you're bored like me, reading back issues of My Year Of Flops on the Onion AV Club is fun.


4:03 pm - I think they are moving me to my room soon. Maybe there will be cable.


4:34 pm - I have been moved: room 4350. You can try calling me at 206-598-6288 if you feel like it. And yes, there's cable. My view was better last time though...


4:40 pm - The TV has one button. It turns it on... then proceeds through each channel in turn... and then turns it off. Oh for another button. Maybe I can have Amy bring in our universal remote.


Pulse Oxygen Sensor


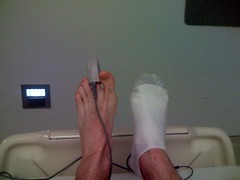
5:01 pm - In a shocking development, my pulse oxygen sensor has been moved from my finger to my toe. Typing just got a lot easier and I'm still rocking 100% blood SpO2 level (and pulse of 72 bpm).


I'm riding a Stryker


8:55 pm - Things have been busy... not really. As I mentioned earlier, I've been on stand-by for surgery. As luck would have it, no spots became available, so I didn't get a spot today. However, I'm officially on the schedule for tomorrow at 1:30 pm, so the odds are good that I'll actually see some time under the knife. In the meantime, no surgery today meant I was finally allowed to eat something. Bonus points to Amy for scoring me a hot dog. Much tastier than what eventually came for dinner. I just did a few laps of the ward with the nurse pushing my IV behind me, which was good to stretch my legs, but now it's back to the bed.


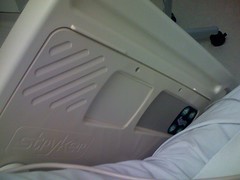
Speaking of the bed, to answer Penney's question I seem to be sitting on a Stryker. Thanks for saying hi everyone. I apologize for moving from LJ to blog land, but ever since they sold LJ to the Russians... ; )


Wednesday, Dec. 19th, 2007


9:33 am - Glory be, I have survived the night. Not that there was ever much doubt, but it's mostly a question of whether I could take all the random poking and prodding that takes place when most normal people should really be asleep. This includes taking my vitals at 1:00 am and 5:00 am, a chest X-ray at 1:30 am and then a consult with my doctors at 5:30 am. Not to mention the fact that I kept dislodging my pulse-oxygen sensor from my toe, which always sets off a lot of annoying beeping (but no calls of Code Blue thankfully).


The situation is still pretty much the same. Surgery is scheduled for roughly 1:30 pm and I'll probably go in two hours early for prep. I'm not sure how long it will take, but my press secretary Amy Wheeless will be handling all questions at that time.


On a side-note, I realized I can see the Allen Center from my window. I can never escape that place.


7:19 pm - I survived the surgery, but I am currently losing the war to stay awake versus my pain killers. I will try to update, but this could be rocky. Actually, it will be a lot like writing an English essay at 3 am back in the days of undergrad... write a sentence... fall asleep at the keyboard for a minute... wake up and write another sentence...


The surgery was a success. They found a bleb, a blister like structures on the surface of the lung, that is prone to popping. They successfully removed the bleb, mechanically scraped up the inside of my chest cavity so the lung would adhere better as it grew back, and patched me up. All told, the procedure probably took less than 45 minutes.


Fixing the bleb is a good thing, because there is a much better chance that this won't ever happ again. My doctors were happy, so I am too.


The downside to the surgery is that my mouth is super dry from anesthesia and the various drugs they gave me. No matter how much water I swish around in my mouth, it still dries out again. It will be nice when that resolves itself. The next annoying thing is that my stomach is a little rocky after surgery. I can eat and drink, but I feel a little weird and get a little burpy. Burping with a couple holes in your chest is not really pleasant. Better than nausea I suppose.


Shout outs to Neva for visiting me this morning, bringing donuts and good cheer. She also helped take care of all my gear while I was in surgery and also loaning us her car for a while. Shout outs to Micah for visiting as well. Whoo just passed out for a bit ;) Micah gets bonus points for putting up with my rambling, morphine-induced conversation.


Ok... I'm going to sleep some more ;) Final shout outs to Amy for taking care of me. She wins.


btw they moved me to a new room: Room 5228 with a phone number of 206-598-6759.


Thursday, Dec. 20th, 2007


12:47 am - I'm waiting for my 1 am check up and a last shot of oxycotin before I head off to bed, so let me take this opportunity to answer a few frequently asked questions:

Does it hurt? Yep. They're big fans of rating your pain on a 0-10 scale, where zero is feelin' good, feelin' great and 10 is frowny face on fire. Though it's all subjective, I was rocking a 2 for most of yesterday and I'm currently hovering around a 4 or 5. The pain is always the worst when I breathe... so I try not to do that. The pain is mostly from my chest tube... a rubber hose about the size of my thumb running through a small incision in my rib cage to a vacuum pump on the wall. The vacuum sucks out any air that has escaped into my chest cavity, allowing my lung to re-inflate and heal up.


When will you be better? My doctor seems pretty optimistic, saying I might have the tube out tomorrow, which would be much faster than last time. Possibly discharged on Friday and mostly back to normal by Saturday. We'll see how it goes.


Can you fly after a collapsed lung? No... probably the worst part about the whole thing. Flying after a collapsed lung is dangerous because the pressure change can cause trouble for your lung. The no-fly order only lasts a few weeks, but it's enough to put a major damper on getting home for Christmas.


Are you high on pain killers right now? Nah, I'm still waiting on that night cap of a double shot of oxycotin, which should knock me out for the night.


Any crazy accessories you get to play with? The deep breathing exerciser is the strangest by far:


Deep Breathing Exerciser


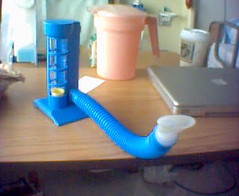
That's a picture of the one I used the last time I was in here, but my new one looks just the same. The idea is that you suck on the tube for as long and hard as you can, getting the little yellow floaty thing to hover at the top of the column. It's just as inappropriate as it sounds...


What's your least favorite thing on the TV at the moment? Those Comcast big-ole-expensive phone company commercials. I want to set the television on fire when I see them.


What's your favorite way to waste time on the Internet at the moment? I'm a big fan of Desktop Tower Defense, a Flash-based strategy game. Otherwise, Google Reader and all the feeds are my weapon of choice.


Are you high on pain killers NOW? Yep! The nurse just brought me my meds for the night... crazy sleep here I come.


11:08 am - Big news on a busy morning. The odds are looking better and better that I will actually get out of the hospital today. As in the six hours. It's insanity, but apparently I am making a pretty speedy recovery from my surgery.


After my 4 am chest x-ray and 6 am consult with the doctors, they decided my lung was looking pretty good, so they took me off active suction to see if the lung would stay up on its own. The lung seems to be holding strong. I just got back from my most recent x-ray about 10 minutes ago, and if it looks good, the chest tube is hopefully coming out next. That's great news because the chest tube hurts like hell. Who knew cutting a hole in your side and sticking a large tube in there would be so painful? Oh wait, I did from the last time this happened. At least I wasn't awake for the resident wiggling his thumb around the hole in my chest like last time. Seriously.


Since my lung has been doing better, my nurses have adopted a take-no-prisoners attitude to get me ready to go. They kicked me out of bed, made me walk around, and I even had to eat breakfast sitting in a chair. So much for breakfast in bed. There have also been a number of unmentionable acts committed in the name of getting my digestive system back in gear after the surgery. For your sake, I will not elaborate.


Thanks to CC and Jeremy for coming to visit me last night. I was mostly out of it the entire time, so I am thankful they didn't write embarrassing things on my forehead while I snoozed. I'm pretty sure Amy had the Sharpie ready to go.


It feels great now that my mouth is not nearly so dry. Last night was just painful... I needed to eat something so I could start taking Oxycotin without getting nauseous, so they brought me Jello (good idea) and saltine crackers (bad idea). Remember that eating contest where you try to eat three saltines in a row without drinking any water? Remember how that's mostly impossible? Trying to do it when my mouth was not producing any natural saliva was particularly tricky. Thank goodness for the Jello.


12:53 pm - The chest tube is out! Now there's something I'm glad I only have to do once today.


3:04 pm - The latest x-ray is in... the news is good... I'm going home!


Addenum - Read it here.

Sunday, August 5, 2007

Why Not Jam?

You've just whipped up a big batch of buttermilk biscuits and as you peel back the flaky, buttery layers, you wonder, "what could you possibly want to put on a biscuit this good to make it taste better than it already does?" Amy says, "Nothing!". However, I would argue there are three things: 1) more butter, 2) a deep fried pork chop, or 3) jam. Butter is clearly the easy way out and deep fried porkchop is probably only applicable if you ever find yourself worrying that your cholesterol level is just too low, gosh-darn it. But jam... oh sweet sweet jam.


Let's be clear from the start. I'm not talking about that crap in a jar Smuckers tries to peddle you with images of lazy country afternoons with grandpa on the farm, but with flavors that suggest instead lazy afternoons in the stainless-steel fruit processing vat. I'm not even talking about fancy jam that is created by Trappist monks who chose celibacy so that they might instead screw you over with the prices of their product. No, I'm talking about homemade jam. Just like the kind my mom used to make (and still does).


Making jam seems like a scary task. Images of endlessly boiling glass jars and fears of botulism might scare away otherwise adventurous jam makers. However, two words my friends: freezer jam. The process is simple: mash up some fruit, stir in a bunch of sugar, add some fruit pectin dissolved in boiling water, stir, and then store in the freezer until you are ready to eat. I'm glossing over the specifics, which can be found on the easy-to-manage recipes inside the box of fruit pectin, but the take home message is that in under 30 minutes, with no more cooking than boiling a cup of water for a minute, you can make a year's supply of jam that is cheaper than what you'd buy in the store and tastes infinitely better.


Still you might ask, "Why bother?" I'll tell you why... freezer jam is so damn good that you will often say "Screw the biscuits" and just eat it with a spoon. Literally, the two main ingredients are fruit and sugar. Bonus points if the fruit is either peaches and/or raspberries. What's not to understand?


A few tips if you decide to the jam route:


  1. Make peach jam. Seriously, it is incredible and not something you can typically find in the grocery store even if you wanted to. Peach-raspberry is also good.

  2. By small (~ 1 cup) plastic containers to freeze the jam in. Sure, it's cheaper to buy larger containers, but I've found that 1 cup is a reasonable size to work your way through between the time you defrost and the time you spoon that last bit of jam onto a PB&J sandwich.

  3. The recipe will often ask you to stir until all the sugar is dissolved and give an approximate time. It's a good idea to actually taste the jam at this point and make sure all the sugar is dissolved.


I just finished making my yearly supply of peach and peach-raspberry for the year. Here's hoping it lasts through December.

Lessons Learned: iTunes Album Artwork and Giant Posters

I've learned a few valuable lessons about life, love, an iTunes album artwork in the last few weeks. Let's share.

Lesson One

iTunes 7 introduced a handy new feature for automatically downloading album artwork. Now, I don't have an iPhone or a newer iPod that can display album artwork in a sleek way. In fact, I really don't have any good reason to find the album artwork for all my music. However, everyone has a little bit of OCD locked up in their brain that needs feeding from time to time so maybe there is a reason I spent a couple hours one evening finding all the artwork for the 400+ tracks of the recent Mixtape Challenge.


Imagine my dismay when I discovered that none of the artwork was transferred when I put a mix on my iPod or shared a mix with a fellow mixtaper. Turns out that iTunes keeps all the artwork separate from the actual music file by default. A simple applescript can set things straight. Oh well.

Lesson Two

Right around the time I spent hours digging up album artwork for the Mixtape Challenge, http://lifehacker.com/ linked to an article about creating giant posters from your iTunes album artwork. Sounded like a cool thing to try on the mixes, no? Unfortunately, the posted solution was Windows-only and assumed ownership of Photoshop. What's a lowly Mac owner such as myself to do? Write up my own Applescript to do the same thing. Grab the script source and give it a run, or check out my own poster:


Album Artwork Poster

Wiki Creole For the Masses

I'm a big fan of Wiki-like syntax for marking up text to display on the web. Apparently, I'm not the only one, as there has been an effort to standardize the various Wiki editing dialects into a common Wiki style. The http://www.wikicreole.org/ project is the most visible result of that effort, as they've attempted to codify a number of common Wiki markup rules into a loose standard that all Wikis can adopt. Unsurprisingly, their Wiki Creole is pretty similar what you probably already know if you spend much time on Wikipedia or any other site powered by Media Wiki. Many wiki engines already support Wiki Creole: the PmWiki I setup for the Society And Technology group at UW, the OddMuse wiki that run my personal site, and a ton of others.


One place that doesn't support Wiki Creole is the Blogger software that runs this blog. It'd be nice if I could just edit my posts using Wiki Creole directly (anyone have any ideas?), but in the meantime, there are some intermediate solutions.


The kids over at http://www.meatballsociety.org/ actually wrote a Javascript implementation of Wiki Creole 0.4 that you can play with. It's a simple WYSIWYG editor that lets you enter Wikie Creole formatted text into a textfield and get rendered-on-the-fly HTML. Unfortunately, their editor makes it impossible to grab the actual HTML source for the rendered text, making it less than useful if you wish to paste the HTML source into your blog. So I wrote up a slightly modified version at http://www.traditionalcake.org/cgi-bin/wiki.cgi/WikiCreoleEditor that makes grabbing the source HTML a snap. Try it out if you like.

Friday, July 27, 2007

Transforming Mac OS X Property List (plist) XML Files for Easier Handling


If you've every dealt with a Mac OS X property list XML file (.plist), such as that produced when exporting an iTunes playlist file, then you've maybe noticed the structure is a pain to work with, especially with respect to XSL transformations.


Consider an example:


<plist version="1.0">
<dict>
<key>Major Version</key><integer>1</integer>
<key>Minor Version</key><integer>1</integer>
<key>Application Version</key><string>7.3.1</string>
...


The xpath expression to select the Application Version looks something like:


/plist/dict/string[preceding-sibling::key[1] = 'Application Version']


All those selectors using "preceding-sibling" are a pain to write and less-than-clear. I think it's helpful to first transform the plist into a more useful form first. What if we could make the above plist snippet look like the following:


<?xml version="1.0"?>
<plist version="1.0">
<dict>
<entry key="Major Version">
<integer>1</integer>
</entry>
<entry key="Minor Version">
<integer>1</integer>
</entry>
<entry key="Application Version">
<string>7.3.1</string>
</entry>
...


With this new form, we can now rewrite our selector as:


/plist/dict/entry[@key = 'Application Version']/string


It's more concise, easier to write, and clear about what is actual going on in the code. I like it. We can use XSL to transform any plist XML file into this new form. The transform is as follows:


<?xml version="1.0" encoding="ISO-8859-1"?>
<xsl:stylesheet version="1.0"
xmlns:xsl="http://www.w3.org/1999/XSL/Transform">

<xsl:template match="/">
<xsl:apply-templates mode="element" />
</xsl:template>

<xsl:template mode="element" match="dict">
<xsl:copy>
<xsl:for-each select="@*">
<xsl:attribute name="{name()}">
<xsl:value-of select="." />
</xsl:attribute>
</xsl:for-each>
<xsl:apply-templates mode="dict" select="key" />
</xsl:copy>
</xsl:template>

<xsl:template mode="dict" match="key">
<xsl:element name="entry">
<xsl:attribute name="key">
<xsl:value-of select="." />
</xsl:attribute>
<xsl:apply-templates mode="element" select="following-sibling::*[1]" />
</xsl:element>
</xsl:template>

<xsl:template mode="element" match="*" >
<xsl:copy>
<xsl:for-each select="@*">
<xsl:attribute name="{name()}">
<xsl:value-of select="." />
</xsl:attribute>
</xsl:for-each>
<xsl:apply-templates mode="element" />
</xsl:copy>
</xsl:template>

</xsl:stylesheet>


In Mac OS X, you can apply this transform right at the command line with the xsltproc command.

Sunday, July 15, 2007

Maple Bacon Cupcakes

Tired of vegetarians stealing all your cupcakes? Finally, a solution. Credit to Jon Hsieh, who sent me this recipe most likely after hearing of my illustrious history of bacon baked goods (bacon cookies anyone?). I made these recently for a cookout, where they were definitely a hit with some and feared by others. I felt the flavor was good, but the texture was a little coarse for my tastes. I've modified the original recipe for maybe a bit of improvement?


4 1/2 Tbsp. of butter, room temperature

1/2 Tbsp. of bacon drippings (left in the fridge to become solid)

5 Tbsp. of brown sugar

1 egg

1 1/4 cup of all purpose flour

1 tsp. of baking soda

1/2 tsp. of baking powder

tiny tiny pinch of kosher salt

4 Tbsp. maple syrup

1/4 cup of milk

1/4 cup of minced bacon, cooked and drained


Cook some bacon in a fry pan (about 6 thick strips). Reserve the drippings and place in the fridge to solidify. Mince 1/4 a cup of the bacon. The chef should eat whatever is left to assure that the bacon is tasty.


Beat the crud out of the butter and solidified bacon fat 'till light and creamy. Add the brown sugar and beat well until combined. Add the egg and beat until incorporated.


Sift the flour, salt, baking soda and powder together. Combine the milk and maple syrup. Alternate additions of half of the flour, half of the liquid, the remaining flour, and finally the remaining liquid, mixing each addition just until combined. Fold in the bacon bits. Scoop into cupcake papers and bake at 350 F for 18-22 minutes or until a toothpick comes out clean.


Maple Syrup Frosting


4 Tbsp. of butter

2 Tbsp. of maple syrup

1 cup of powdered sugar

turbinado sugar (optional, but recommended)

coarse grain sea salt (optional, but recommended)


Combine the syrup and butter until combined. Add the sugar, a bit at a time, and whip at high speeds until combined. Pipe or spread onto cupcakes. Sprinkle on sea salt and turbinado sugar for decoration and a lot of added flavor.

Chocolate Revel Bars

Chocolate Revel Bars are a good answer to the question, "I love oatmeal cookies and I love brownies... can't I have both?"


Crust


1 Cup butter, softened

2 1/2 Cups flour

2 Cups packed brown sugar

2 eggs

2 tsp. vanilla

1 tsp. baking soda

3 Cups quick rolled oats


Filling


1 1/2 Cups semi-sweet chocolate pieces

1 14-oz. can sweetened condensed milk

2 Tbsp. butter

1/2 Cup chopped walnuts or pecans

2 tsp. vanilla


Directions


In a large mixing bowl, beat the 1 cup butter till softened. Add half the flour to the butter. Add brown sugar, eggs, 2 tsp. vanilla and baking soda. Beat until throughly combined. Beat in remaining flour and oats; set aside.


For the filling, in a medium saucepan, heat the chocolate pieces, condensed milk, and the 2 Tbsp. butter over low heat until the chocolate is just melted, stirring occasionally. Remove from heat. Stir in the pecans and 2 tsp. vanilla.


For the crust, press 2/3 of the oat mixture into the bottom of an ungreased 13x9 inch baking pan. Spread the filling over the crust. Drop the remaining oat mixture by teaspoons on top of the chocolate layer. Bake in a 350˚ oven 25-30 minutes or until the top is lightly browned.

Wednesday, July 11, 2007

Pie Crust for Fun and Profit

With Optional Apple Upgrade

Makes two 9" pie crusts

The Ingredients

3 cups flour
1 1/2 tsp. salt
1/3 cup butter
2/3 cup + 2 Tbsp. butter-flavored shortening
~8 Tbsp. ice-cold water

The general rule of thumb is to keep everything cold: the shortening and butter, the water, even the flour. I keep my butter in the fridge and my shortening in the freezer to keep both as cold as possible, but still workable. Warm dough gets sticky, which means you have to add more flour, which makes the final dough tough. You can optionally use lard in place of the shortening, but be sure to find one that doesn't taste so much like bacon.

Cutting the Shortening

Mix the flour and salt in a large bowl. Put the butter and shortening in the bowl, and put it in the fridge for a while (5-10 minutes). Once everything is nice and chill, cut the butter and shortening into the flour using a pastry blender until it has a chunky consistency, with chunks about the size of small peas. Work quickly so as to avoid heating up the shortening too much. Also, be sure to use a cutting motion (vertical) with the blender and resist the urge to grind with the blender.

Another approach that works well when you don't have a pastry fork (or even when you do) is to freeze the butter and shortening ahead of time and then grate them right into the flour with a cheese-grater. You then work the mixture with your fingers for 30-60 seconds until the desired consistency is reached.

Adding the Water

Begin adding the water to the dough in 1 Tbsp. increments, mixing with a fork. The goal is not to thoroughly mix, but simply moisten the ingredients. Depending on the humidity and other mysterious factors, you may need to add less than or more than the full 8 Tbsp. of water. A good test to see whether your dough is ready is to pinch a few pieces together and see if they stick together without dry cracks.

Preparing to Roll

At this point, the dough can be divided into two and formed into two balls. Try not to work the dough too much; the goal is not to kneed the dough. The balls can be wrapped in plastic wrap or waxed paper and kept in the fridge while you are preparing the rest of the ingredients for you pie. In fact, you should probably refrigerate the dough for a while before rolling regardless of when you will need the dough. When you are ready to roll, remove the dough from the fridge, let it warm back up for 20 minutes, and then press the dough with your hands into a flat disk about 2" thick on a floured pastry cloth.

Oh We Rolling Now

Begin rolling the dough, always starting in the center of the disk and moving outwards. After each roll, pick another path 30º off the original, so that you slowly work around all directions of the crust, creating a nice, consistent circle.

When the circle has reached desired thickness and size, loosely place a piece of plastic wrap over the dough and then gently fold the dough in half, such that you're left with a half-circle of dough. The dough is a lot easier to move this way and the saran wrap keep it from sticking to itself. Place the half-circle of dough into a pie plate and unfold the dough.

Cool Decorative Stuff Goes Here

Adding decorative borders to crust is an art-form not easily described with words. The basic gist is to trim the dough so about an 1 to 2 inches overhang the edge of the pie plate. Next, fold the dough underneath itself so that a small curl of pie dough is sitting on top of the lip of the pie plate. At this point, you can do all sorts of decorative pinching, molding, and squeezing. Or you could just bake it as is, and you'd be fine.

On The Topic of Pre-Baked Crusts

When you need to pre-bake your crust for use in a cream pie, be sure to take a fork and liberally poke many holes into the crust. These holes will allow hot air to escape from underneath the crust when baking. Without the holes, the crust would balloon up and generally, it'd be bad. When poking, be sure to wiggle the fork around a little bit so as to open up the holes. Just stabbing the dough will create small holes that will seal back up as the dough is heated in the oven. Be sure to refrigerate the crust before baking; the crust must be chilled for proper results. Generally, bake the crust in a 450º oven for 9-11 minutes, checking towards the end for proper browning.

Extra Credit: Apple Pie

6 cups apple (Golden D + Granny Smith)
1/4 cup flour
3/4-1 cup sugar
1 tsp. cinnamon

The key to a good apple pie is good apples. Specifically, you want something that's a little bit sweet, a little bit tangy, but most importantly, an apple that will not bake down to mush. Crisp apples like Golden D and Granny Smiths work well. Avoid Red Delicious like the plague. Regional apples likes Jonagold, Honeycrips, Pacific Rose, and other varieties are worth a look too.

Peel and core and cut the apples into 1/2-inch-think slices. Mix the apples and the remaining ingredients, adjusting the sugar based on the sweetness of the apples. Let apples sit and juice up for about five minutes.

You'll have previously wanted to prepare the two 9" pie crusts mentioned above. Roll out one of the crusts and place it into a pie dish. Pour the apples into the pie dish, spreading evenly. Cut a few tablespoons of butter up and place the chunks randomly over the apples. Roll out the remaining pie crust and place it over the top of the pie. Proceed to trim and crimp the edge of the crust as described above.

So that the pie doesn't explode while baking, cut a few triangular slits in the center of the pie crust. These can be as decorative as your knife skills allow, but their main purpose is to allow and outlet for hot, expanding air inside the pie as it bakes. Try not to cut the holes close to the edge, as the filling tends to bubble out.

To get nice browning of the crust, you may wish to brush the top of the crust with a little milk, or an egg mixed with milk. Keep an eye on the pie as it is baking. If it's looking too brown, you can cover it with tin foil to stop the browning.

Bake the pie at 400º for 15 minutes. Reduce the temperature to 375º and bake an additional 20-30 minutes. You can tell the pie is done because the filling will appear bubbly.

Enjoy.

Tuesday, July 10, 2007

File Sharing Websites

Looking for a good website to send a large file to a friend or two? There are a ton of sites out there, but some are definitely better than others. Here is my take on the sites to use:


Good


senduit : A very simple, non-intrusive site that does simple sharing and does it right, with fast downloads to boot. [maxfilesize: 100 MB]


yousendit : One of the more prominent sites, it's simple, non-intrusive, and has fast downloads. Also one of the few sites with bandwidth limits, so do the math before sharing a large file with lots of people. [maxfilesize: 100 MB, maxdownloads: 100, maxbandwidth: 1G]


mediafire : Similar to yousendit, but without download caps. [maxfilesize: 100 MB]


Bad


sendspace : Slightly larger file sizes are offset by the ad-heavy layout and broken-support for download managers and slowish download speeds [maxfilesize: 300 MB]


zshare : Clean, unobtrusive interface, but sluggish download [maxfilesize: 100 MB]


zupload : Larger file size supported but also more ads and sluggish downloads [maxfilesize: 500 MB]


uploadhut : Small file size, more ads, and super sluggish downloads [maxfilesize: 50 MB]


rapidshare : Ad-heavy interface and so-so speeds [maxfilesize: 100 MB]


sharebee : More of a meta-file-share, it uploads your file to a number of other file-share sites. Unfortunately, it uses mostly bad ones. [maxfilesize: 100 MB]


Ugly


The following sites are infested with invasive pop-up ads, time delays that force you to look at ads before downloading, and other shenanigans:


megaupload
turboupload
depositfiles
sharebigfiles


None of the following sites worked for me:


filefactory
spread-it
mytempdir

Wednesday, June 20, 2007

Buttermilk Biscuits

How can something so simple be so good? Maybe it's because two of the three ingredients are butter.

2 cups self-rising flour

1/2 cup (1 stick) of butter, cold

3/4 cup buttermilk, plus a few tablespoons more as needed


Biscuits are just another type of pasty, which means you will be following the general pattern of cutting fat into flour. For the cutting, you can use a pastry fork, a food processor, or even two knives if you are a real masochist. Either way, you want that butter cold, just out of the fridge. Another interesting method is to freeze your butter and then grate it into your flour with a coarse cheese grater.

Measure the flour into a large bowl. Cut the butter into the flour using your method of choice (pastry fork, food processor, knives, cheese grater + frozen butter). The goal is to keep everything chilly, so work fast so your butter doesn't have a chance to get warm and melty.

Gradually add the buttermilk, slowly folding together the dry and wet ingredients as you would muffins. The goal is to just blend everything until moistened, working the dough as little as possible. Additionally, your goal is to use just enough liquid to get the dough to stick together. Use too much and you will get a soggy mess. This is the most subjective part of any pasty recipe, so you may have to practice a bit. Even when the dough seems a little too dry, it often rolls out quite nicely.

Kneed the dough once or twice, form it into a ball, and place on a floured surface. Roll out the dough into a rough rectangle about a 1/2 inch thick. Fold the dough in half and roll out it out again. Fold and roll one last time, but this time only roll to a thickness of 1 inch. All the folding isn't strictly necessary, but I've found it often gives a flakier biscuit with a better rise. At this point you are ready to cut out the biscuits.

The key to getting a good rise out of your biscuit is to get a clean cut. If you don't have a biscuit cutter, it might be tempting to use something like a water glass to cut out the biscuits. Unfortunately, the thick edge of the glass will crush the edge of the biscuit down, creating a sort of seal. I've found a better option is to use a sharp knife to cut out square biscuits. The knife gives a very clean cut and there is less waste than a round cut.

Before baking, you might brush a little bit of milk on the top of each biscuit to help with browning.

Bake the biscuits at 450º for 10-12 minutes or until the tops turn golden brown. Purists will brush the top of the biscuits with melted butter when they come out of the oven. I am a purist.

A Piece of Traditional Cake

I've got a new blog. The theme will be cooking, hacking, and things I want Google to find. Grease up the tubes, because here it comes.

As for the title... it always comes back to donuts with me.